Free Inquiry – Log 8: The Final

Image of a red painted gundam model kit under dramatic lighting
Photo by Matt Lee

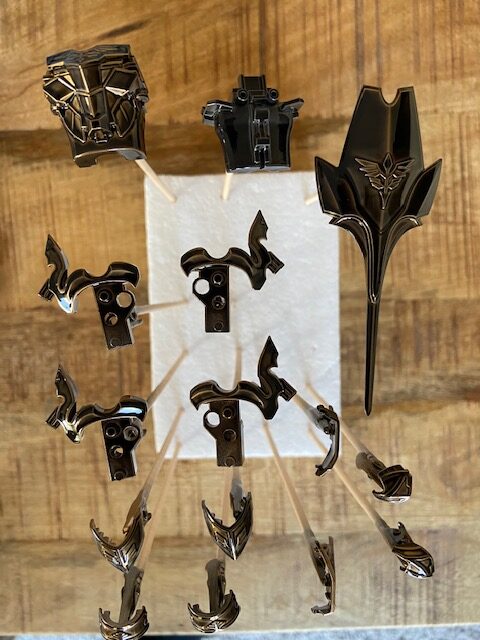
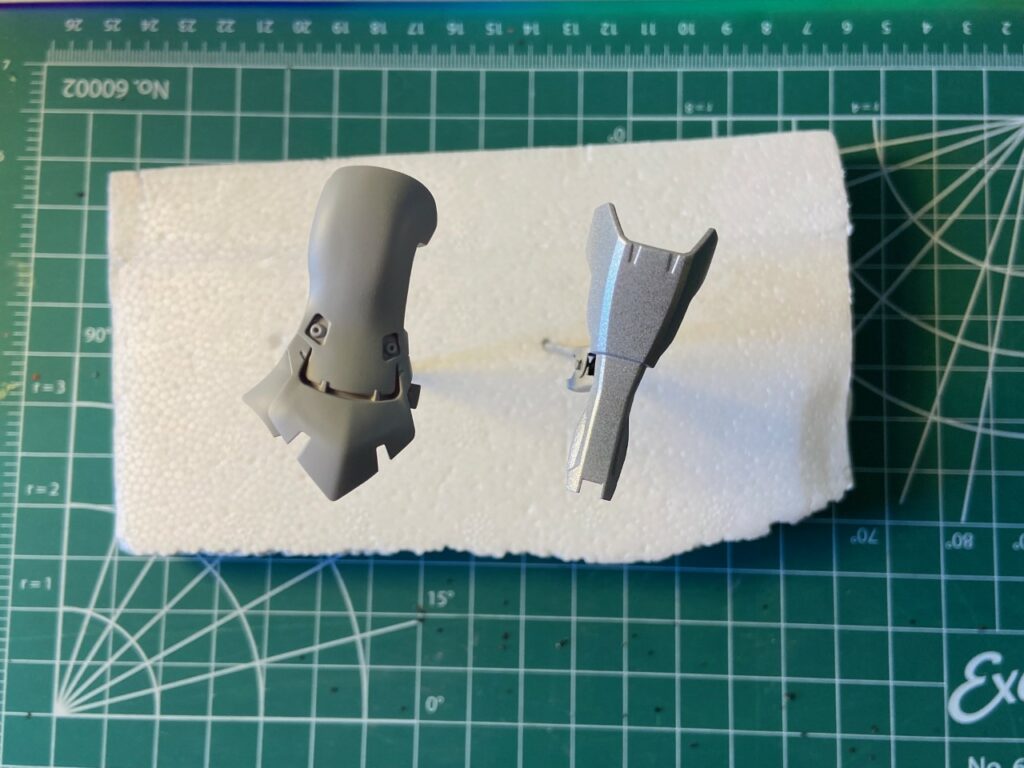
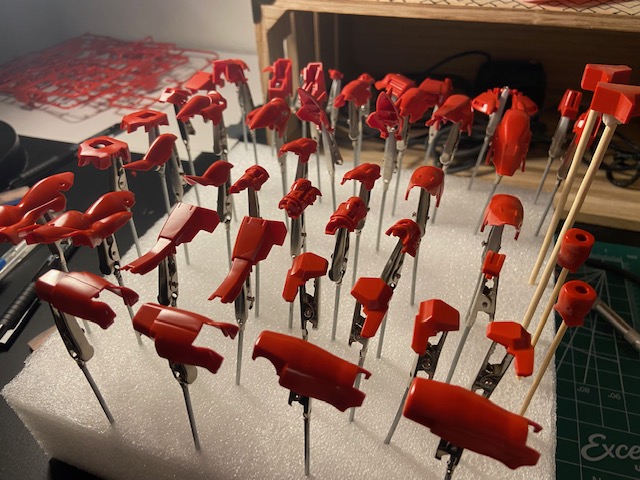
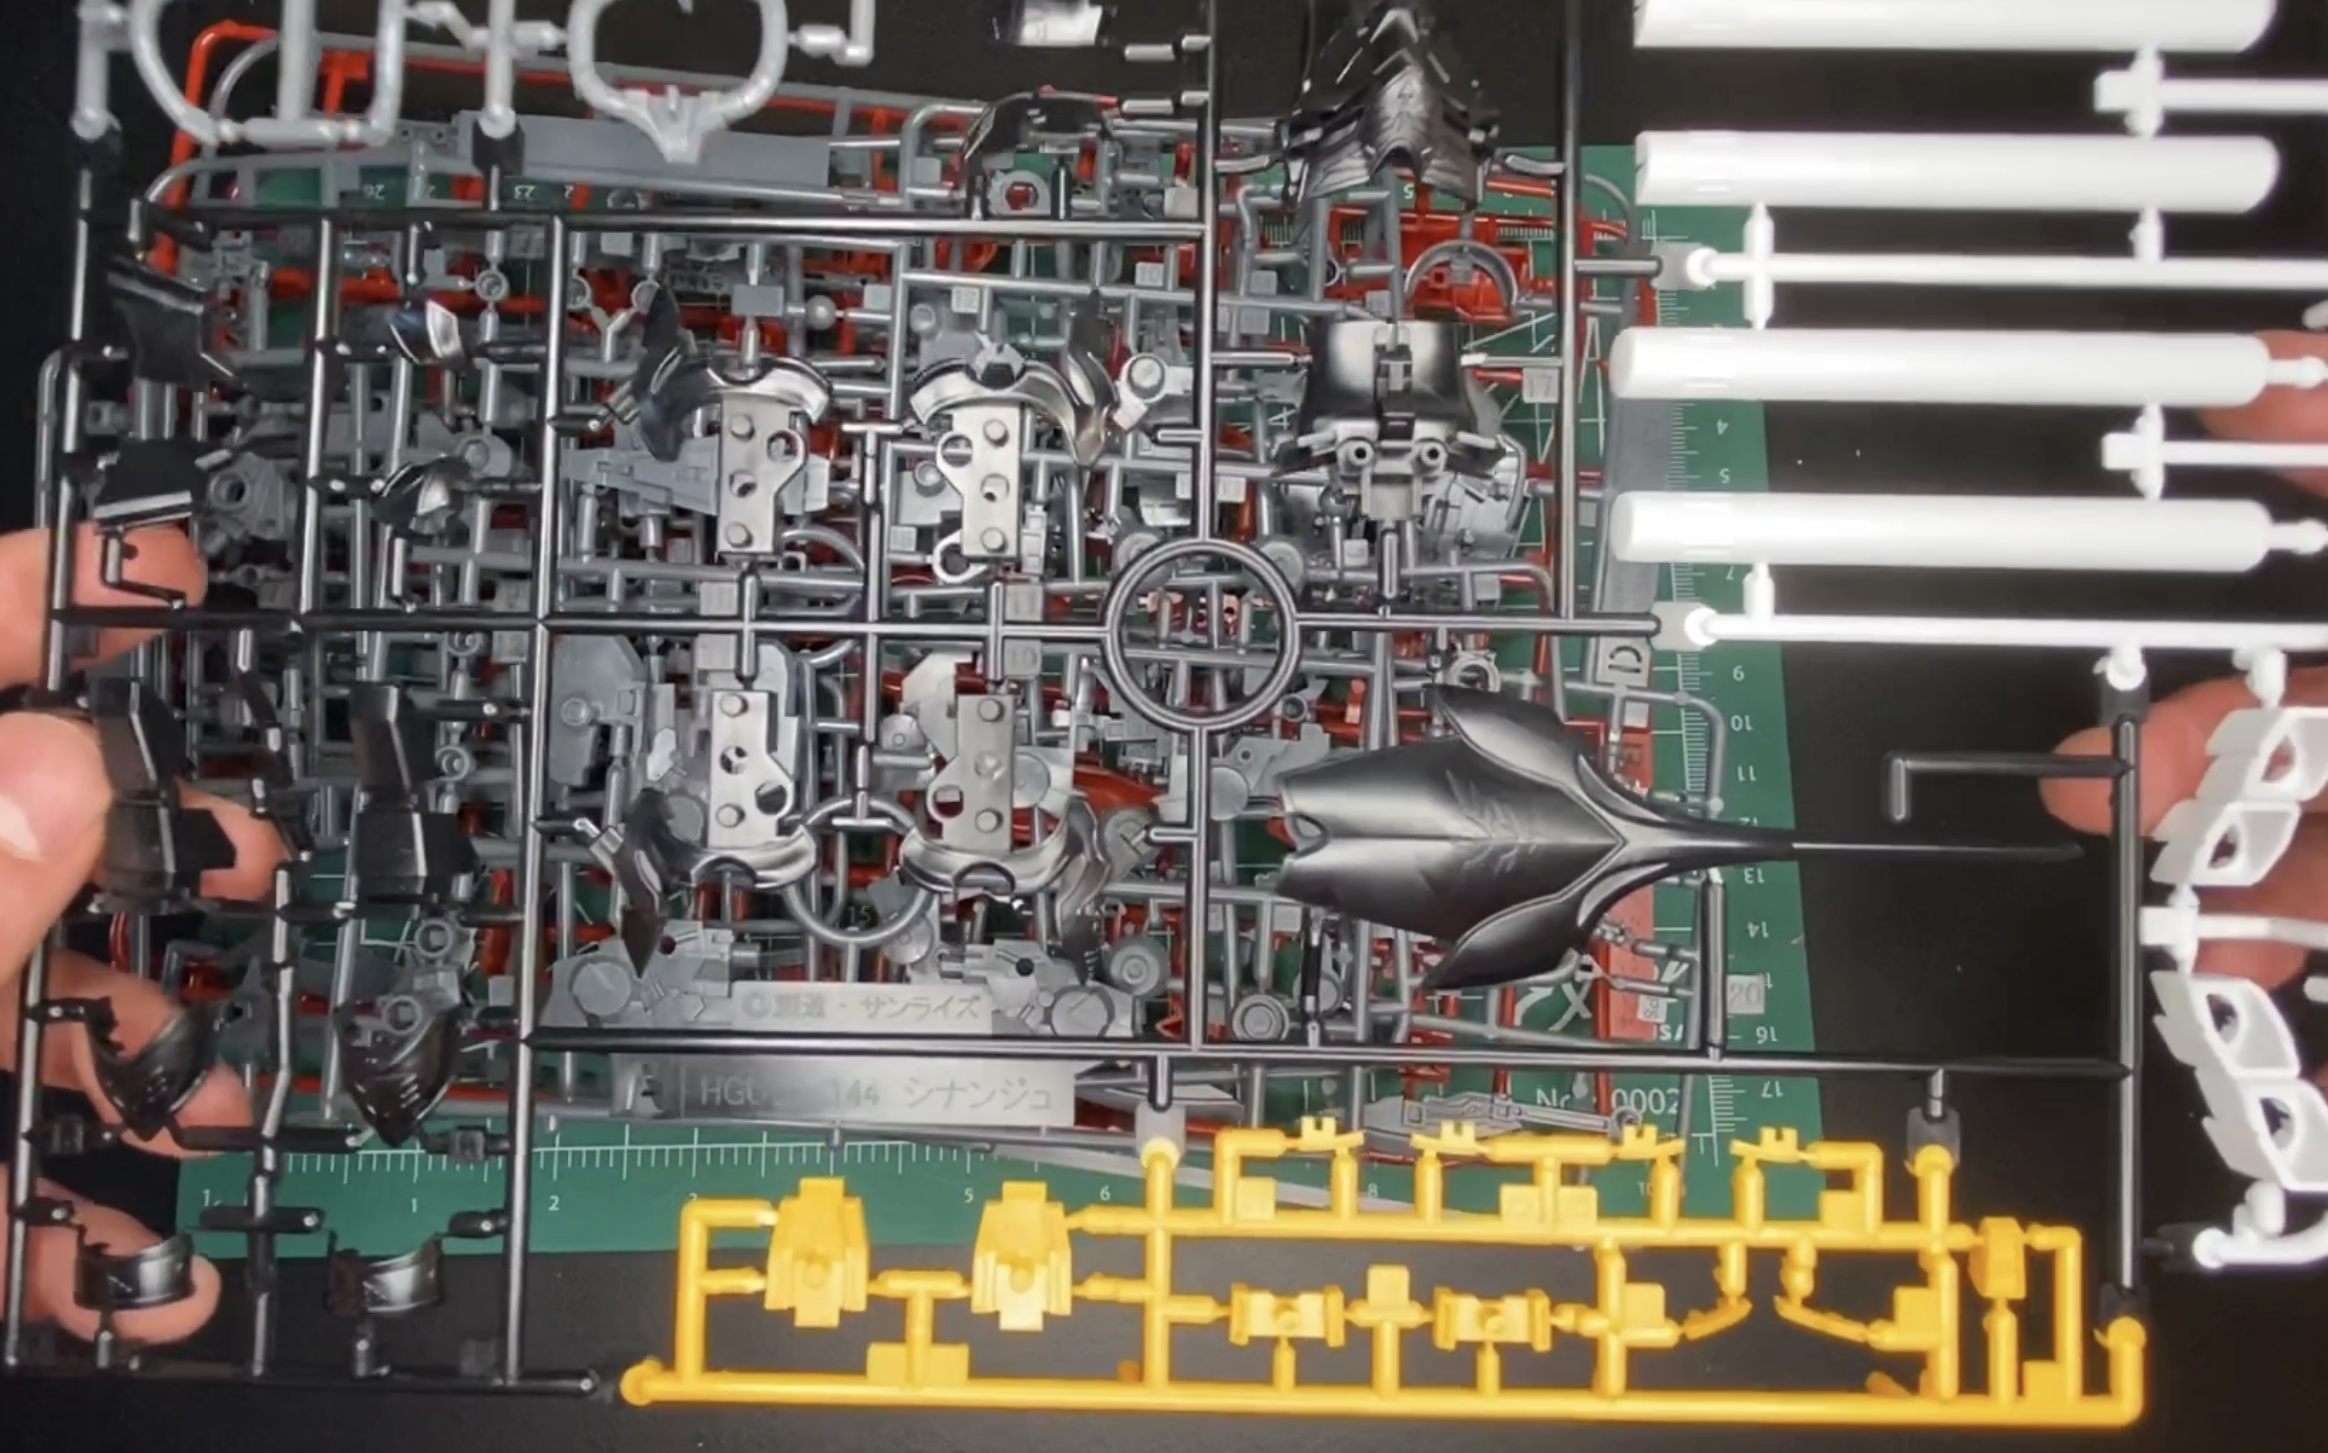
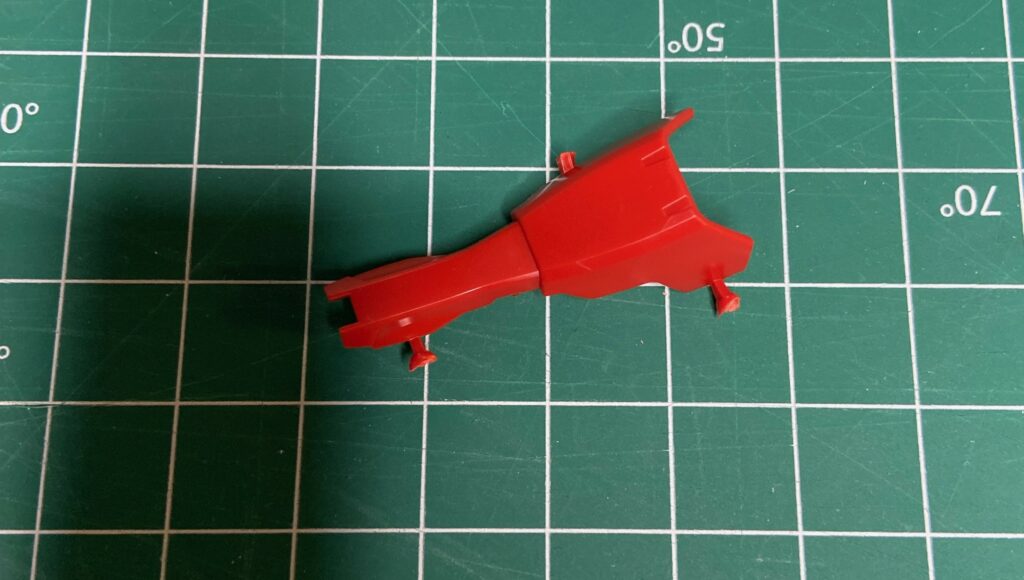
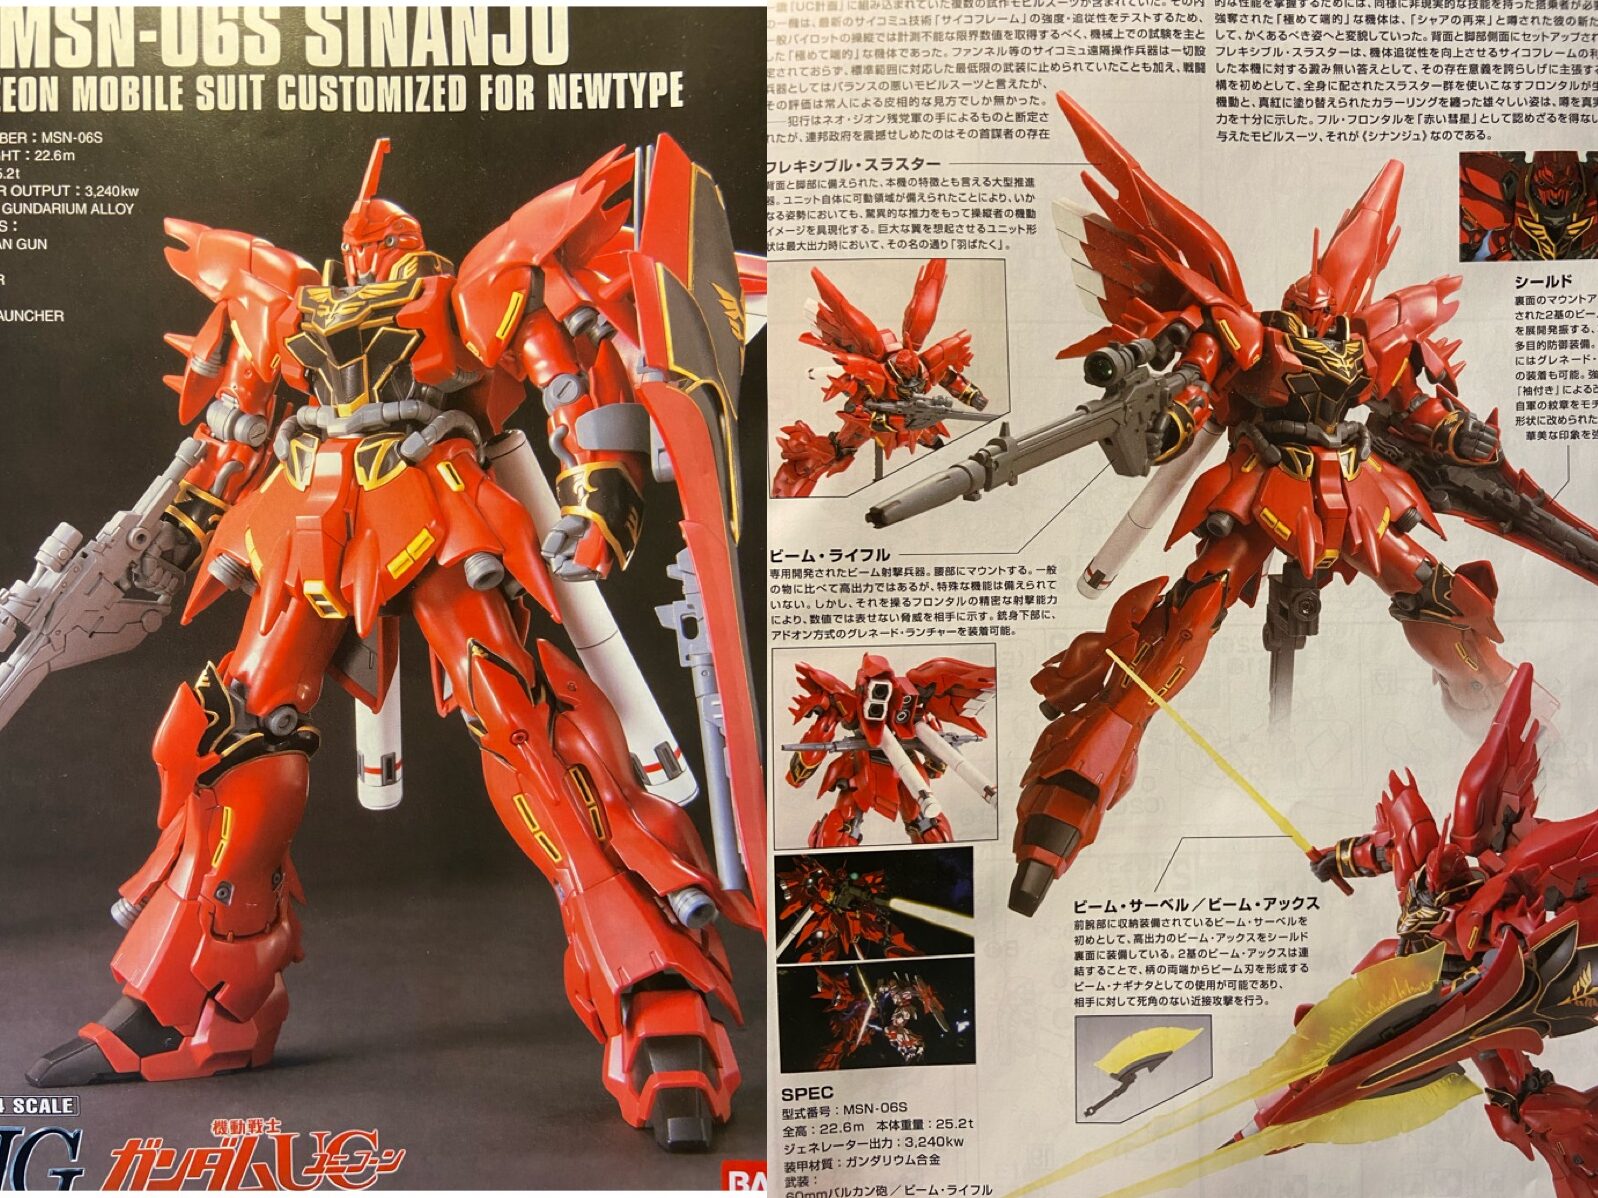
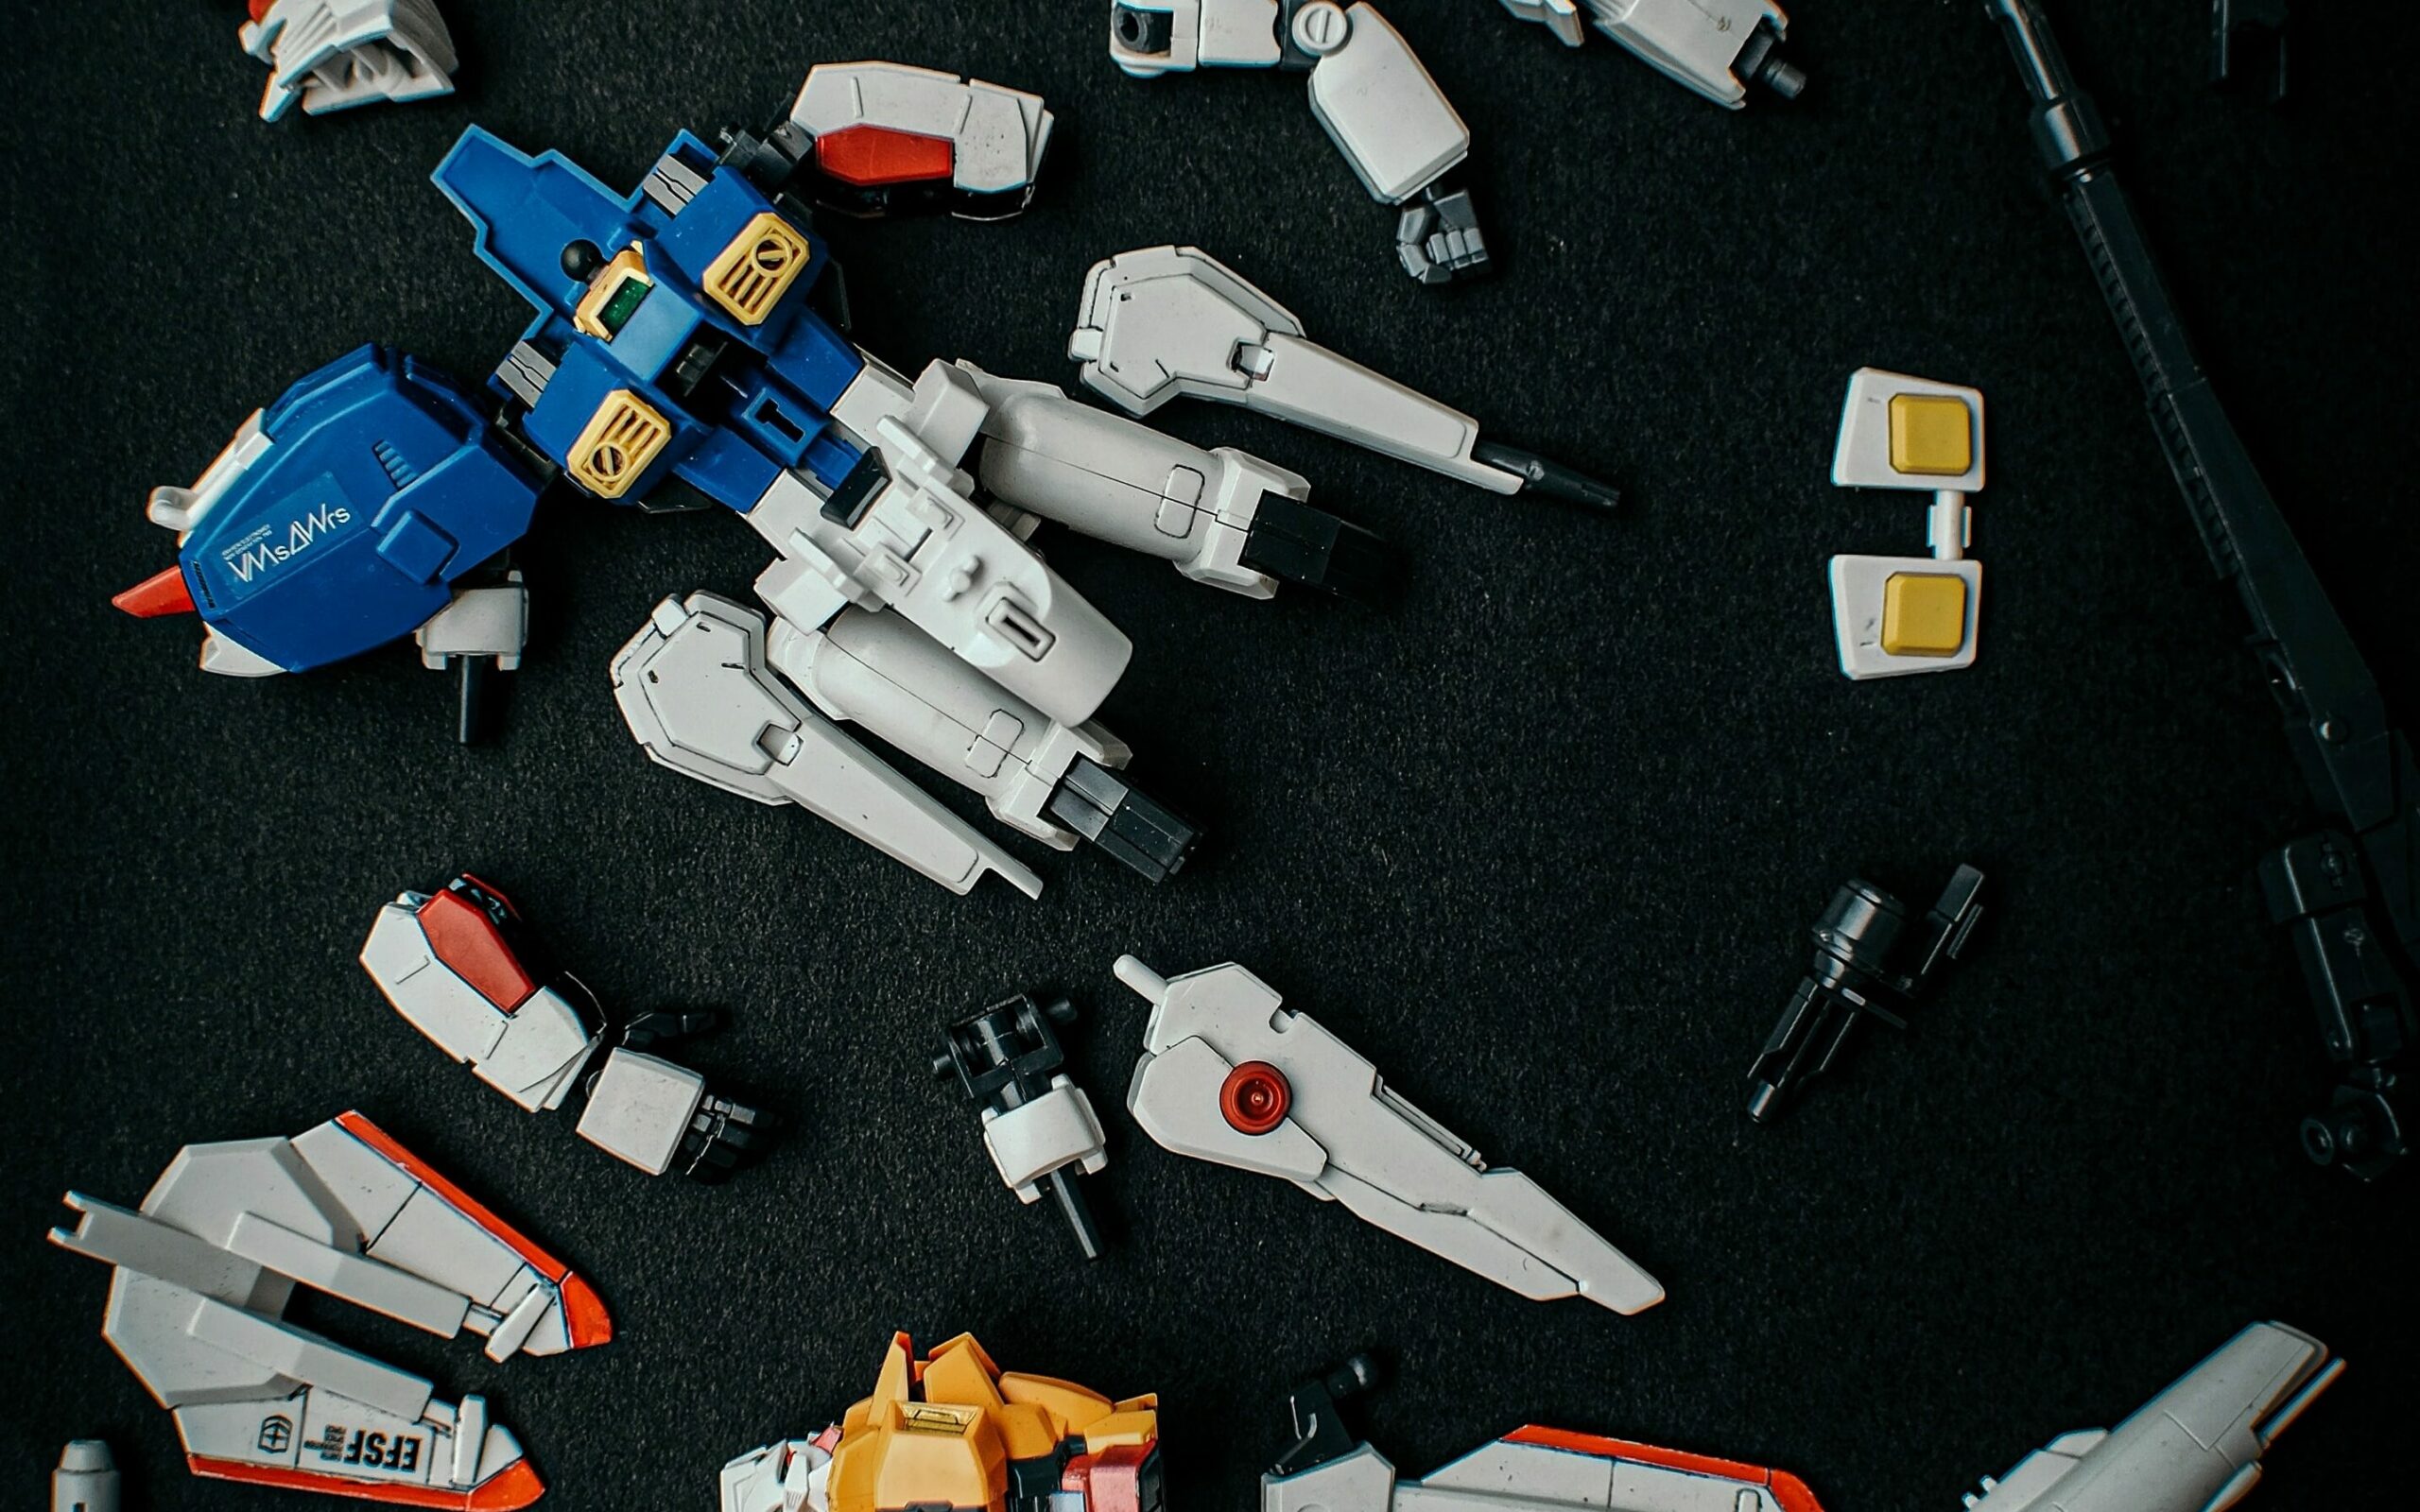
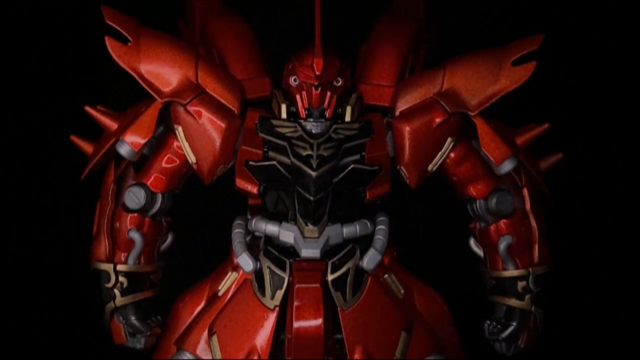
And here it is; finally finished in all of its glory. The 1/144 scale MSN-06S Sinanju. 40+ hours of work and I couldn’t have asked for a better result. I’m sad to say that this journey has come to an end, but I’m overwhelmed with joy that the build project is finally finished.

Reflecting on this whole process, I can confidently say that I thoroughly enjoyed it and would definitely do it again. Learning how to use various technological tools and getting to document my work using them was such a fun experience (and has actually made me consider a career in content making!). The whole process from start to finish was such a rollercoaster and I had to overcome many barriers along the way.

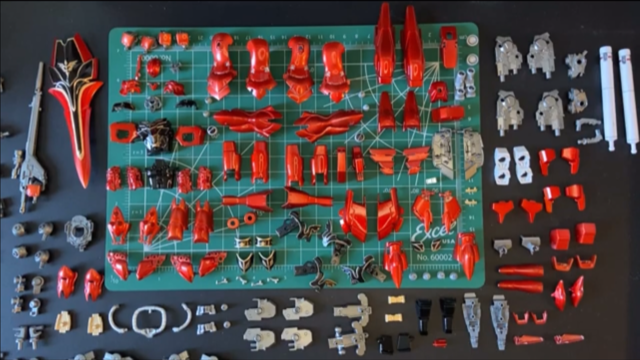
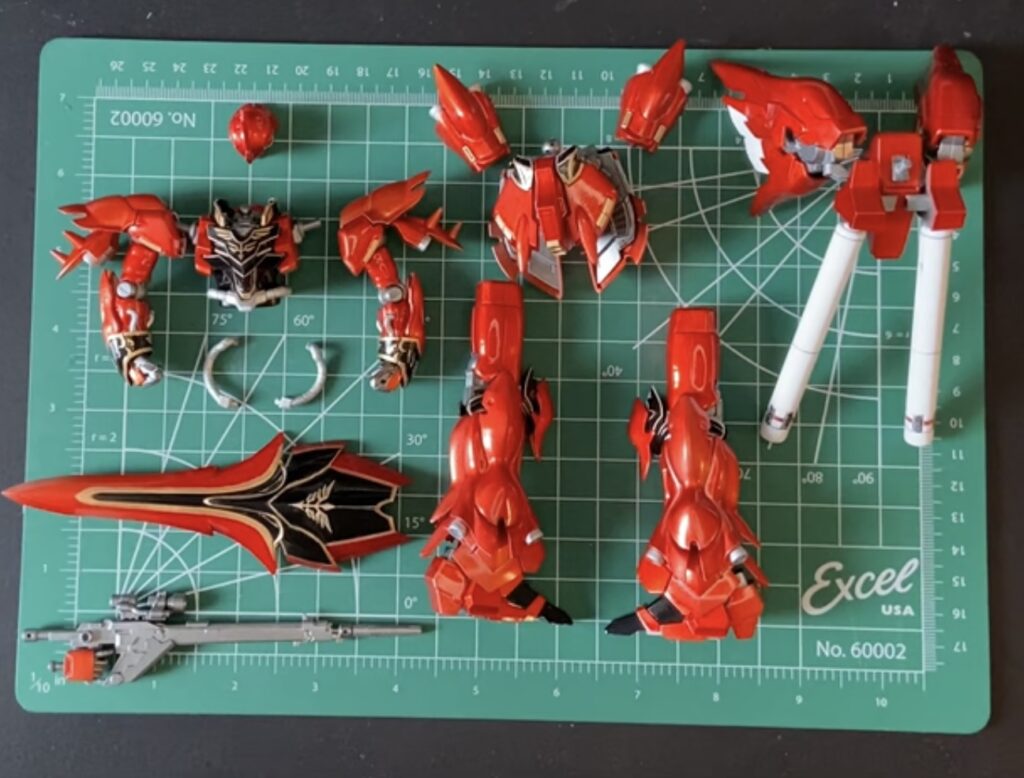
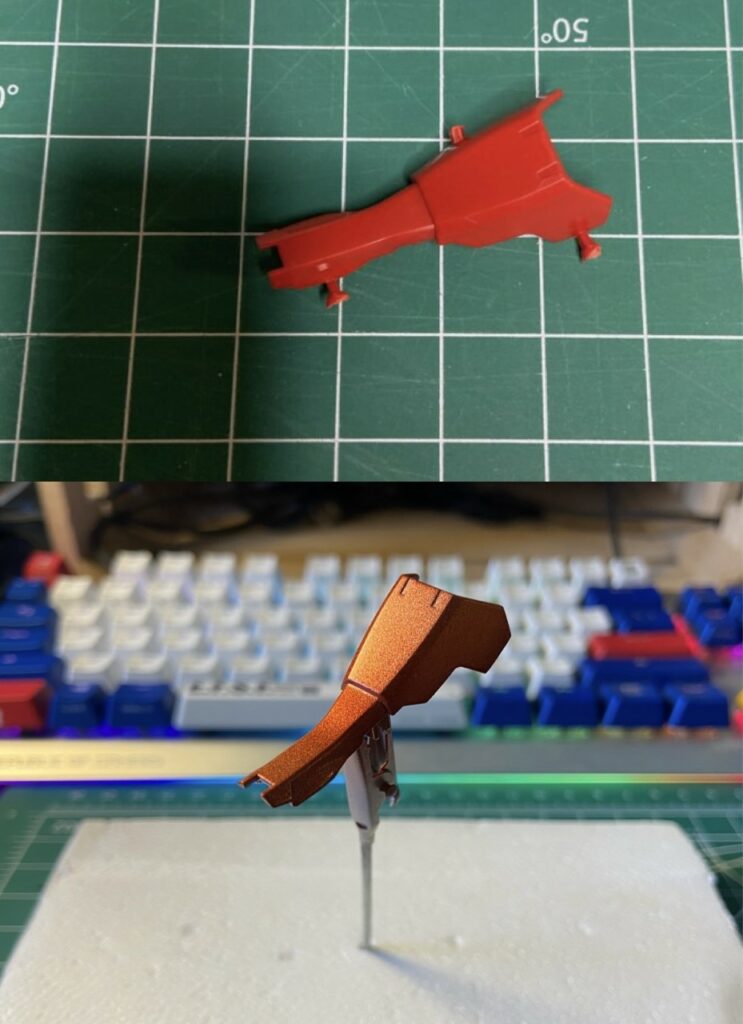
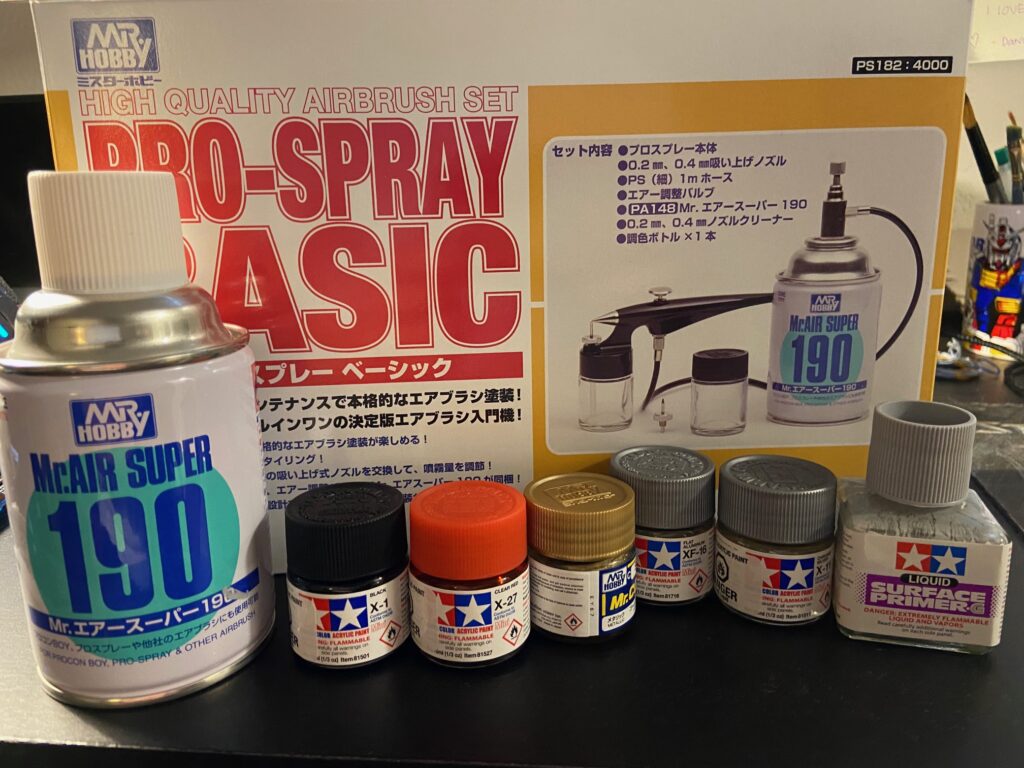
First I was running out of air for the airbrush, then I was having issues with my paint ratios, and on top of that, I let the enamel paint cure for too long, which in-turn affected my gold parts. But amongst all that, I ended up with a premium model kit that definitely doesn’t look like it was a chunk of plastic that was bought for $40. Like I said, I do plan to do more projects like these in the future, and considering what I have learned now, I would make a few adjustments. I would probably use the Mr. Hobby aerosol primer instead of loading it up into the airbrush (you can see why I made that switch in last week’s post). Another thing I learned was that if I let my enamel coat sit for too long, I can actually end up rubbing off the gold underneath it as well when I remove it. It’s not that noticeable on my kit, but you can see the spots where that happened.

Image of a finished red painted gundam model standing on a hobby mat
Photo by Matt Lee

Overall, the entire journey was a blast. I’m glad you all got to join me on this project, and I’m looking forward to sharing many more. Below is a short video recapping the whole project from start to finish (stay to the end for a cool edit). And that wraps up my EdTech Free Inquiry Project! Until next time my friends!

Free Inquiry – Log 7: Home Stretch

Hi everyone and welcome back to the Free Inquiry Log! I can’t believe we’re almost at the end of this journey. This week, I had a lot to cover after a few minor setbacks.

I realized a little while that halfway through painting the red parts, I wouldn’t have enough air to finish airbrushing the rest of the project. To help myself conserve resources, I switched my primer from using Tamiya’s airbrush surface primer to Mr. Hobby’s Mr. Surfacer Primer from an aerosol can. I actually found myself to prefer this method better because the primer already comes pre-mixed, so I don’t need to fiddle with correctly ratioing the primer to thinner. It was also a lot more efficient.

Eventually, I was able to get additional compressed air to continue my project, but now it was crunch time. I started with painting all of the parts with the gold detailing their base gold colour. Once that coat was dry, I applied the gloss black enamel paint. My first coat was a little bit too liquid for my intended purpose. I had mixed too much thinner with the enamel, so the paint became very diluted and did not apply in the way I wanted. It did, however, create a cool, weathered gold effect on my parts, but again, that was not the look that I was goin for. I let the first coat dry, then re-mixed my paint ratio and re-applied the gloss black. This time I did get the desired look and then began the reverse wash after that coat had dried.

Image of a display of gundam parts that are black and gold.
Photo by Matt Lee

For this process, I took some hobby Q-tips and dipped them in a little bit of enamel thinner. I then slowly rubbed away the black on the areas where the gold detail will shine through. This part was extremely satisfying as it gave a certain high-quality look to my parts that there was no way I would have achieved with stickers. I mean, look how clean the Zeon crest looks in the video!

Once that was done, I simply airbrushed the rest of the inner frame parts in the gunmetal grey and the verniers in a flat aluminum. And with that, it’s time! All parts have been completed and are ready for assembly! I can’t wait to finally show you all what these processes will lead up to and what the final product will look like. That’s all for now and I will see you all next week for the final chapter in this project!

Free Inquiry – Log 6: Trust the Process

Hi everyone and welcome back to the Free Inquiry Log! In our most recent update, we’ve added colour! This step was super exciting as I finally got to see some noticeable progress on the project. Here is a short video that breaks down the process.

I once again used the airbrush to apply the paints. According to my plan, I first applied a coat of metallic silver to my primed parts. This process was a little bit difficult as the difference between the primer and the metallic silver paint was very subtle, so it was hard to tell if I was getting proper coverage as I was painting. You’ll see in the image below what the metallic paint (right) looks like compared to a part with just primer (left).

Two gundam parts side by side, one being a flat grey colour and the other a shiny silver colour.
Photo by Matt Lee

As you’ll see, one of them has a little bit more luster to it, but the difference is still subtle. But that’s what is going to give them the shiny look once I’m all finished. Now that the parts had been given their chrome undercoat, it was time to add their colour. Since I wanted the shininess of the silver to come through, I used a clear red paint with the airbrush. The paint acted more like a stain and was easier to see how well I was covering each part. Below you can see a comparison of the same part just snapped out of the box versus after I had fully painted it.

A before and after comparison of a gundam part that has been given a chrome red finish.
Photo by Matt Lee

That wraps it up for this week, and I’m looking forward to showing one of the final steps before assembly, which is the reverse wash technique for the gold detailing! See you all then!

Free Inquiry – Log 5: Prime Time

Hey everyone and welcome back to the Free Inquiry Log! Progress on my project has been going a little bit slower than expected, but I’m happy to finally be getting painting this time! So, as the title gives away, this post will be focusing on applying the paint primer to all of my parts.

Below here is a picture of my airbrush and paint setup. The airbrush I will be using is the Mr. Hobby brand Pro-Spray Basic that functions using a can of compressed air. Along side it I have my primer, which is Tamiya’s grey surface primer, and my various acrylic and enamel based paints. Today, we’ll be focusing mostly on using the primer.

Image of an airbrush box accompanied by a compressed air can and various coloured bottles of paint.
Photo by Matt Lee

When using these types of paints with the airbrush, it is important that the consistency of the paint is correct so that it sprays through the airbrush properly. That is why I have to use the lacquer thinner with the primer. I mixed the two together with a ratio of primer to thinner of about 1:2. The trick is to get your paint to be the consistency of milk. Once that was all set up, I could attach the hose from my airbrush to the can and spray away. Here is a video of the process (including the sanding from last week).

As seen in the video, I sprayed in short bursts rather than a continuous stream. It’s really important that I apply the first coat in thin layers as I do not want the paint to “goop” up on my parts. Besides, I can always apply a second coat should my parts need more primer afterwards. Now that my parts are primed, I can finally start adding colour! That’s all for this post and I can’t wait to share what is next to come!

Free Inquiry – Log 4: Sand & Wash

Hey everyone and welcome back to the Gundam build log! This time, I will be finishing up all of the preparation of the parts, so that means we will finally get to see some painting next post! Last week, I was just cutting out all of the parts and removing the extra nubs. For this post, we will look at how to sand the pieces and wash them so that they are ready for the paint primer.

A picture of a red gundam part being sanded with a green sanding sponge.
Photo by Matt Lee

In the above image, you can see me sanding one of the parts. Normally, I wouldn’t do this as sanding can take away the natural gloss of the plastic, but since I am painting, this will not matter. It is also better to sand parts when painting so that they are as smooth as possible for a nicer looking finish. To do this, I use 600, 800, and 1000 grit sanding sponges (as seen in the photo).

Once all of the parts have been sanded, there is one final step to prepare them for paint: giving them a wash with soap and water. The reason it is recommended to do this when painting gunpla is because out of the factory, the parts have industrial oils that would affect how the paint goes onto the parts. If I was just straight building the kit however, I wouldn’t need to wash.

A picture of red gundam parts in a steel bowl filled with soapy water.
Photo by Matt Lee

I let the parts soak in warm, dish soap water for about 30 minutes here and then scrubbed them with a toothbrush before giving them a rinse. I only did the red ones for now because those are going to be painted first. One thing that is really important though is that natural body oils can still affect the parts, so it is recommended that I wear gloves when handling them from now on.

The next thing I did was put all of the parts on these gator clips that you’ll see below. Now they are all ready to get that first coat of paint!

A picture of red gundam parts on sticks stuck into a foam block.
Photo by Matt Lee

That’s all for this week, and I will see you guys next time!

Free Inquiry – Log 3: Just Like Building Legos… Kind Of

Welcome back to another week on the Free Inquiry Log! Today, we’ll finally be taking a look at the start of the build and the preparation stages of my model kit. If you’ve ever built one of these before you’ll know what this is all about. But if not, that’s no worries at all! Just think of it like building a Lego model but with a few extra steps.

Following with my plan, the first phase of the project is preparing all of the parts of the kit. If you are unfamiliar with gunpla, this means cutting out all of the parts from the runners that they come on and then either sanding or filing the nubs that are left over. Now, I know that was a lot of terminology in the last sentence, so lets go over a few things first.

Runners are these plastic grids that hold every single part of the model kit. Sometimes they are referred to as trees or sprues and are used to make it easier to mold the parts all together in the factory and separate them into different colours. The runners also contain details about the kit, such as the name, year they were produced, and, most importantly, the parts numbers and letters. Each runner has an identification letter and numbers for the parts. These labels correspond with the order that parts should be assembled according to the instruction manual.

A picture of a plastic grid of black, white and yellow gunpla parts.
Photo by Matt Lee

Using plastic nippers or sprues cutters, you need to carefully free the parts from the runners. After the parts are cut out, you are left with plastic “nubs” in the areas that they were formerly attached to the runners. Aesthetically, they don’t look pretty on a fully assembled kit, so gunpla builders generally take them off to give their parts a cleaner finish. Below is an image of a roughly cut out part from my kit.

A red gunpla part that has been cut out and has excess plastic nubs from where it was cut off of the runner.
Photo by Matt Lee

There are a few ways to do this such as snipping them off again with the nippers, filing them, sanding them, or using a hobby/exacto knife. Usually, I would just slowly cut away the excess plastic with the hobby knife, but for this project, since I want a premium finish, I will be using a combination of snipping, cutting and sanding.

Here is a short video where I go about the first phase of the build and talk a little bit about gunpla in general.

Once all of the parts have been cut and sanded, they simply snap together, just like Legos. That is what I would usually do, but since I’m painting the kit, there are a few more steps I need to take. Thanks for listening this week and I will see you all next week where we go into detail about sanding and washing the parts.

Free Inquiry – Log 2: Materials and Techniques

Hello everyone and welcome to week two of my free inquiry project! This week I will be going over the model that I will be making and taking an in-depth look at one of the videos I mentioned last week to learn about the materials that I will need and the painting techniques.

The model that I will be using for this project is the High Grade MSN-06 Sinanju. This is a 1/144 scale plastic model kit form Bandai’s line of gunpla from the anime Gundam: Unicorn. Below are some images of what the kit is intended to look like that I took from the instruction manual.

Photos by Matt Lee

Now, these images are not what the kit will actually look like if you just straight build it out of the box. These pictures are of a model that has been given a professional finish and would require extra effort to attain should one want to build one of the same caliber. For example, the gold detailing on the black sections has been painted, but on the real model kit those gold sections are achieved with unappealing shiny foil stickers. The finished kit itself also does look plastic, like I mentioned in my last post. Lucky for me, I am going to put in all of that extra effort to give it a premium “real-looking” finish. Below you can watch a video where I go into detail about Gseyun’s tutorial and learn about how to spice up my model kit.

In the video I talk about the two main types of paint that I will be using, which is lacquer and enamel hobby paint. The lacquer will cover most of the kit while the enamel is reserved for the black parts as there is a specific technique that I will be using it for that is explained in the video. All of the parts will be primed using paint primer before any of the lacquer goes on. My airbrush will also be a little bit different than the example that I will follow. Instead of having one that is connected to a compressor machine, I will have an airbrush that connects to a can of compressed air to save on costs.

This concludes the planning stage of my project and I am excited to share with you all the action that will begin next week when I start on the kit!

Free Inquiry – Log 1: The Beginning

Hello everyone and welcome to the beginning of my free inquiry project log! For this first post, I will just be discussing my plans for my project, what it is about, and why I chose to do this.

For my free inquiry, I will be honing my model-kit-making skills by applying various airbrushing and painting techniques to give my completed model some extra flair. First of all, what kind of model am I making? A hobby of mine is building plastic model kits called “gunpla,” which are scale plastic models of mecha (robots) from the anime Mobile Suit: Gundam. Building these is incredibly fun in its own right, but sometimes they still look too “plasticky” as a finished product. I’ve always wanted to give one of mine a nice looking premium finish that will make it a little more real-feeling; and that is the goal of my free inquiry project.

Photo by insung yoon on Unsplash

In a nutshell, the steps include preparing the parts, priming them, painting and finally, assembling the final model. To do all of this, I will be following some guides on YouTube from creators 몽몽(gseyun) and Nao. These videos also have some good before and after references for how my project will (hopefully) turn out.

I’m looking forward to seeing how this project will turn out and sharing the progress with you all!